
Trying RabbitLoader on a staging environment
Before trying out the plugin on your production website, it’s a good idea to try it in pre-production aka staging environment. Doing this reinforces confidence in the system especially when you have a number of other plugins installed on your website or there are extensive customizations done on top of the default CMS offerings.
RabbitLoader plugin can be installed on any number of test/staging environments to try it out. You can get started with a free plan and try optimizing at no cost.
Page Contents
Things to know
There are a few points to note when trying our optimization services on staging-
- Before installing the plugin, make sure you fix any existing errors that you see on the browser’s console or on the website pages. Make sure the images, CSS files, JS files, and font files are available and do not return 404 or CORS errors.
- The staging website should be hosted on the web and reachable from our servers.
- WordPress or other CMS installed on local machines (localhost) will not work for the same reason mentioned above. As all the CPU-intensive optimizations are performed on the cloud which is outside your hosting server, the test website should be accessible on the Internet. This will also help you validate the PageSpeed score on Google’s official tool or similar services like GTmetrix.
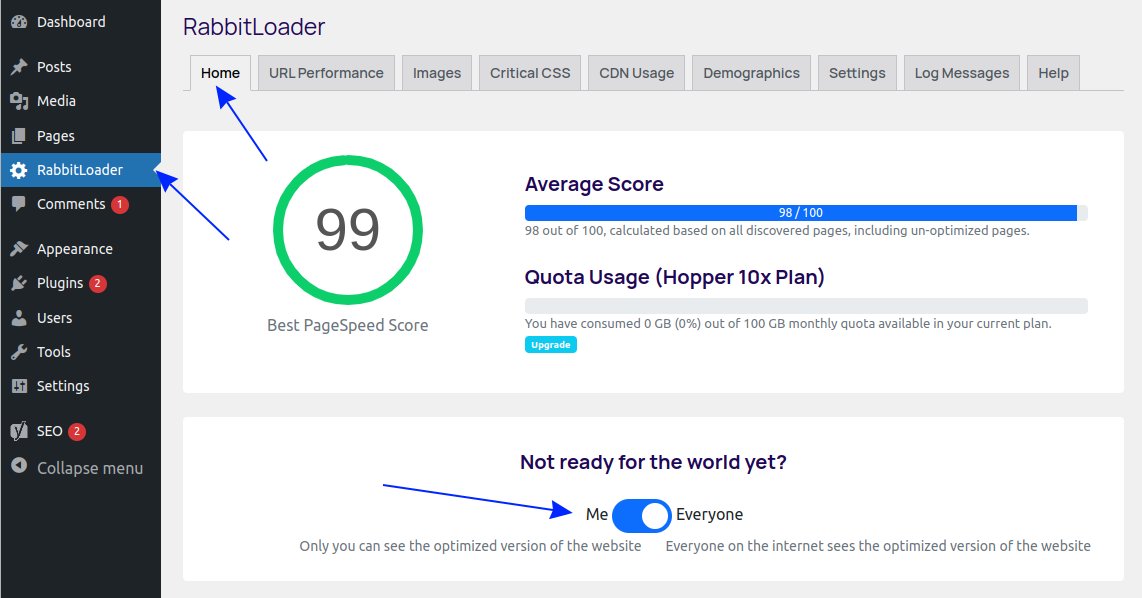
The ‘Me’ Mode
By turning on the ‘Me’ mode from the RabbitLoader plugin home tab, only you can see the optimized version of the website. This is helpful for testing even production websites. By enabling ‘Me’ mode, only you can see the optimized version of the website by appending ‘?rltest=1’ to the URLs.
What is in the domain name?
The hostname or domain name decides how the report is aggregated and shown to you. We will take two examples here to understand when and how the reports are clubbed when multiple instances of the plugin are installed on the same domain name.
example.com vs test.example.com
In this case, when you have two separate and independent WordPress installations under a subdomain e.g. test.example.com and parent domain example.com, Rabbit Loader considers them as two separate websites. HTML content served from both websites will be optimized independently and have no connection with each other. However in case, your setup is like example.com is using images from img.example.com or cdn.example.com, they will continue to work as it is.
example.com/site1 vs example.com/site2
Let’s say you have two separate and independent WordPress installations under the same domain with root as /site1 and /site2. When you install the Rabbit Loader plugin on both the WP instances, both roots will be separately optimized but all reports will appear under the same host “example.com”. Hence, in the reports, you may see the canonical URLs combined from both instances.
Deployment Pipeline
If you have a deployment pipeline that takes of pushing the staging content to production, either in an automated way or manually, you should take care of a few things-
- Since the staging and production website is different, both instances require a separate login and activation with RabbitLoader. This can be done only once at the beginning.
- WordPress websites should exclude the contents of the
/wp-content/rabbitloaderfrom being copied in the deployment process - WordPress websites should not copy the
/wp-content/advanced-cache.phpfile - WordPress websites should not copy the RabbitLoader settings stored in the “wp_options” table of the WordPress database. In general, the settings key can have “rabbitloader” or “rabbit_loader” word which you can use to identify if you want to be selective for this process.
- Make sure you do the “Purge All” every time on the production website to react to the changes done via pipeline.
Managed Hosting Sync Service
Many managed WordPress hosting providers like GoDaddy offer staging to production sync with a simplified UI. If you using something similar, you need to follow these steps after every production sync-
- After the production sync, go to the production site’s WP admin panel -> RabbitLoader -> Settings tab
- Hit the “Disconnect from RabbitLoader” button and then you see the “Activate” button on the same page.
- Hit the “Activate” button and complete the sign-in process.